
Wordpress is one of the best open-source content management system (CMS) based on PHP and MYSQL, it is the most popular blogging system used by more than 23% of the top 10 million websites. WordPress is installed on more than 60 million websites. There are plenty of ready to use themes and plugins available for WordPress. You can use WordPress as your blogging platform, as e-commerce site (with WooCommerce) or as CMS system for your company website. The first Wordpress version has been released on May 27, 2003, by Matt Mullenweg and Mike Little under GPLv2 license.
WP-CLI is set of command line tools to provide a command line interface to manage your WordPress site. From zero to Hero, you can use it to create your WordPress site, manage the WP database, alter the site description, install and manage themes and plugins etc. This is very cool stuff that can save you a lot of time. You can update plugins, setup multisite installations and much more without having to log in to WordPress in a web browser, you can do it all from the shell terminal/SSH.
Prerequisites
- I'll use Ubuntu 15.10 here, but the same steps should be compatible with Debian 8 as well.
- Root privileges
What is covered in this tutorial?
- Installation and configuration of a basic LEMP (Linux, Nginx, MySQL, PHP) server.
- Installation of WP-CLI
- Install Wordpress with WP-CLI
- WP-CLI Commands explained
Installation and Configuration of an LEMP Server (Linux, Nginx, MySQL, PHP)
In this tutorial, I will use Nginx as web server, MySQL as the database system and PHP-FPM to run WordPress. Nginx is one of the fastest web servers, it provides a high performance with low memory usage.
So let's get started, first install all packages with one "apt-get" command:
sudo apt-get install nginx mysql-server mysql-client php5 php5-fpm php5-mysql vim
NOTE: You will be prompted for the MySQL password, please enter a secure password for the MySQL root user and remember that password, we need it later again
Now edit the php.ini file in the directory "/etc/php5/fpm/".
cd /etc/php5/fpm/
sudo vim php.ini
sudo vim php.ini
Please uncomment on line 773 "cgi.fix_pathinfo" and change the value to 0:
cgi.fix_pathinfo=0
Save and exit.
Now configure Nginx to use PHP-FPM, please go to the directory "/etc/nginx/sites-available/" and create a new file for the virtual host configuration.
cd /etc/nginx/sites-available/
sudo vim wpcli.co
sudo vim wpcli.co
Paste the configuration below:
server {
    listen 80;

    #Web Directory
    root /home/vagrant/wordpress;

    index index.php index.html index.htm index.nginx-debian.html;

    server_name wpcli.co;

    location / {
        try_files $uri $uri/ =404;
    }

    location ~ \.php$ {
        try_files $uri =404;
        fastcgi_split_path_info ^(.+\.php)(/.+)$;
        fastcgi_index index.php;
        include fastcgi_params;
        fastcgi_param SCRIPT_FILENAME $document_root$fastcgi_script_name;
        fastcgi_pass unix:/var/run/php5-fpm.sock;
    }

    #include h5bp/basic.conf;

    location ~ /\.ht {
        deny all;
    }
}
Replace "wpcli.co" in the server_name setting with the domain name that your WordPress installation shall use.
Now activate the virtualhost by creating a symlink to the file wpcli.co in the directory "/etc/nginx/sites-enabled/" :
sudo ln -s /etc/nginx/sites-available/wpcli.co /etc/nginx/sites-enabled/wpcli.co
Then create a new directory with the name "/home/vagrant/wordpress/" and create a new file to test the PHP installation with phpinfo(). I will use a user named "vagrant" here, so "cd ~" is the same than "cd /home/vagrant":
cd ~
mkdir -p /home/vagrant/wordpress
echo "<?php phpinfo(); ?>" > wordpress/index.php
mkdir -p /home/vagrant/wordpress
echo "<?php phpinfo(); ?>" > wordpress/index.php
Restart the nginx web server and php-fpm:
sudo service nginx restart
sudo service php5-fpm restart
sudo service php5-fpm restart
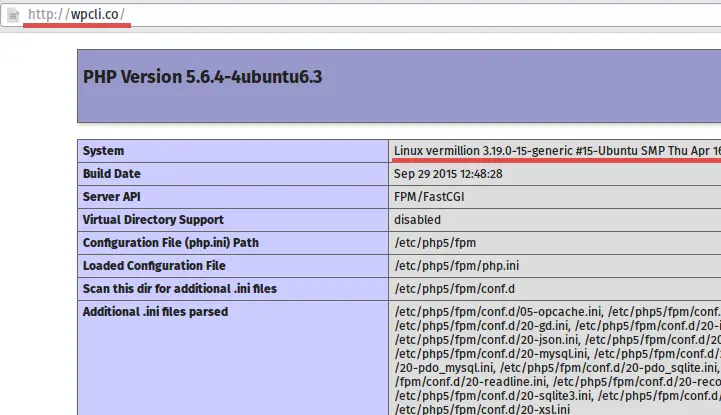
Test the PHP and Nginx installation by visiting the site "http://wpcli.co/" in a browser. Replace wpcli.co with the domain name of your website / server.
Install WP-CLI
To install wp-cli, you have to download the .phar file (.phar is PHP archive format similar to .jar for java) from GitHub with the curl or wgetcommand, I will use curl here:
cd /tmp
curl -O https://raw.githubusercontent.com/wp-cli/builds/gh-pages/phar/wp-cli.phar
curl -O https://raw.githubusercontent.com/wp-cli/builds/gh-pages/phar/wp-cli.phar
Make the wp-cli.phar file executable:
chmod +x wp-cli.phar
And move it to the bin directory, the command renames wp-cli.phar to "wp" for easier usage:
sudo mv wp-cli.phar /usr/local/bin/wp
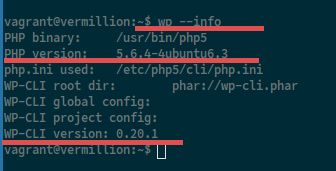
Now test the wp-cli with command:
wp --info
You can see here that I'm using PHP 5.6 and WP-CLI 0.20.
Basic WP-CLI Commands
Until this step we have:
- A running LEMP (Nginx, MySQL and PHP) installation.
- A VirtualHost with domain wpcli.co (or the domain name that you have chosen for your site).
- A Web Directory in "/home/vagrant/wordpress/".
- The WP-CLI command installed.
Now we will install WordPress with the domain "wpcli.co" in the directory "/home/vagrant/wordpress/". We will do this with WP-CLI.
1. Install Wordpress and Configure the Database
Please go to the web directory:
cd /home/vagrant/wordpress/
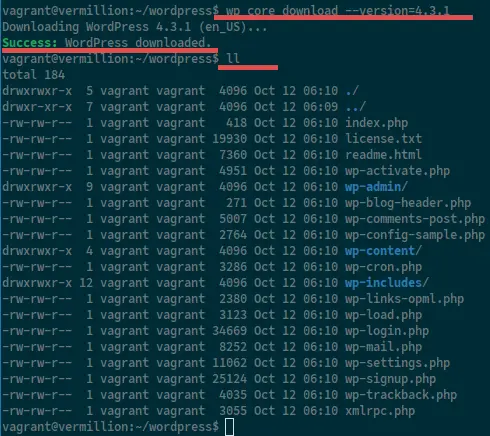
Download WordPress by using wp-cli, you can download a different WordPress version, I will use the version 4.3.1 here:
wp core download --version=4.3.1
If you want to use a different version, just change the version number.
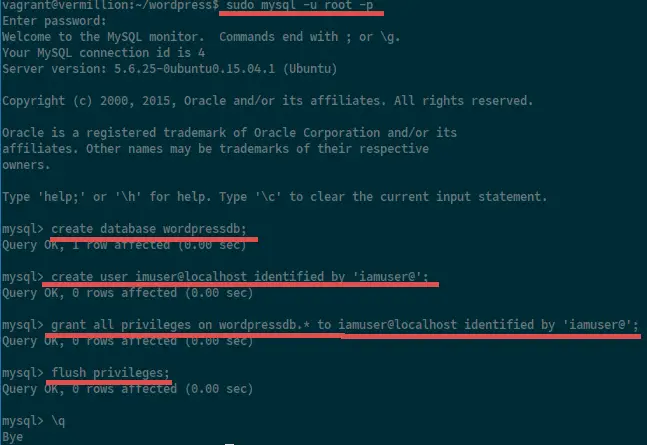
Next, Create the database for WordPress through the MySQL shell, please connect to MySQL server with:
sudo mysql -u root -p
ENTER YOUR PASSWORD
ENTER YOUR PASSWORD
Once you have been logged into MySQL, create a new user and database:
create database wordpressdb;
create user iamuser@localhost identified by 'iamuser@';
grant all privileges on wordpressdb.* to iamuser@localhost identified by 'iamuser@';
flush privileges;
\q
create user iamuser@localhost identified by 'iamuser@';
grant all privileges on wordpressdb.* to iamuser@localhost identified by 'iamuser@';
flush privileges;
\q
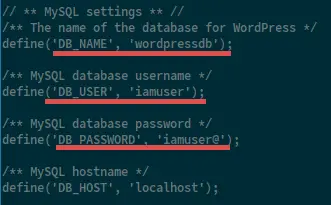
I've created a new database with the name "wordpressdb", a new user "iamuser", and I've granted access for the user to the database.
The database has been created, now I'll create a "wp-config.php" file with the database credentials of the MySQL user that we added above.
wp core config --dbname=wordpressdb --dbuser=iamuser --dbpass=iamuser@
When you see this line, then the file has been created successfully.
Success: Generated wp-config.php file.
The options explained:
- --dbname = Database name
- --dbuser = User that granted to the database
- --dbpass = Database password
Now if you "cat" the wp-config.php file, you will see the database configuration there.
Now it's time to install WordPress with the command "wp core install", the command requires these parameters:
- --url: Your domain name. wpcli.co
- --title: Title of your site.
- --admin_user: Admin username that you use to login to the WordPress.
- --admin_password: Password for admin user
- --admin_email: Your email address to get noticed for any site-related issue.
Let's do it:
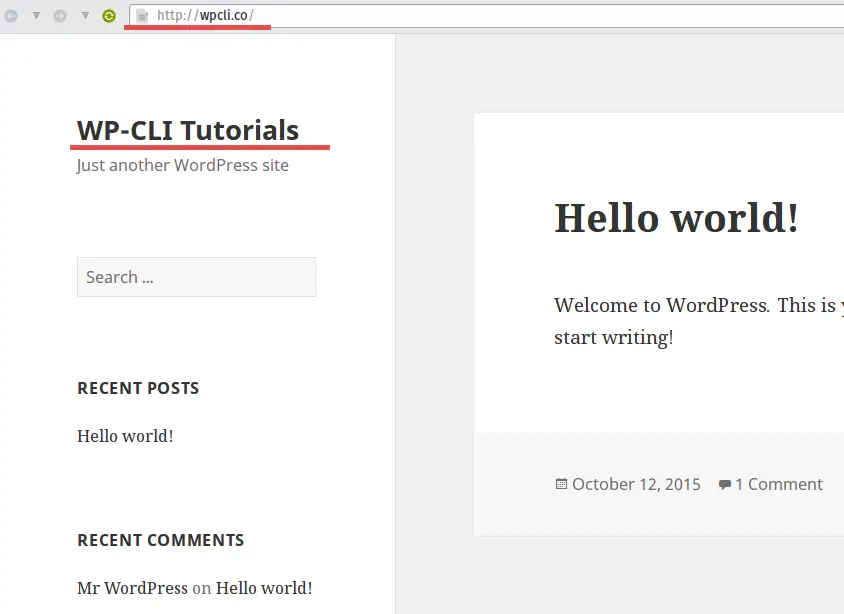
wp core install --url=wpcli.co --title=WP-CLI\ \Tutorials --admin_user=admin --admin_password=aqwe123 --admin_email=admin@wpcli.co
The command results in:
Success: WordPress installed successfully.
Now visit your domain name: wpcli.co with the web browser again.
(If you want to test the admin, please go to wpcli.co/wp-login.php instead).
NOTE:
If you get an error message like "sh: 1: /usr/sbin/sendmail: not found", please install "sendmail" with this apt command:
sudo apt-get install sendmail
2. Managing Wordpress Themes with WP-CLI
Search for available WordPress themes:
wp theme search KEYWORD-THEME
Install a WordPress theme, in this case, the theme with the name "MyKnowledgeBase":
wp theme install MyKnowledgeBase
Once the theme is installed, activate it:
wp theme activate myknowledgebase
Gest a list of all installed themes:
wp theme list
3. Manage Wordpress Plugins with WP-CLI
Search for plugins:
wp plugin search KEYWORD
Install a plugins:
wp plugin install PLUGINNAME
Activate a plugins:
wp plugin activate PLUGINNAME
See all installed plugins:
wp plugin list
Get the plugins status, Active or Inactive:
wp plugin status
4. Manage the WordPress Database
Connect to the MySQL shell by using the WordPress credentials:
wp db cli
Show all tables in the wordpress database:
wp db tables
Export the WordPress database to a .sql file. This is very usefull for backups:
wp db export databasename.sql
Import a WordPress database:
wp db import databasename.sql
Execute a MySQL Query under the WordPress MySQL user:
wp db query "MySQL Query"
5. Other Commands
WP-CLI has many more commands and options, you can use "wp --help" to see all commands. There are commands to manage WordPress users, user roles, posts, the menu, widgets etc.
Conclusion
Wordpress is a popular CMS and blogging platform used on millions of websites. There are many free and commercial WordPress plugins and themes available. WP-CLI is set of commands to manage your WordPress site, it is very useful and easy to use. You can build and manage your WordPress site directly on the shell without having to log into WordPress in the browser.