
Kernel-based Virtual Machine (KVM) is a virtualization module for the Linux kernel that turns it into a hypervisor. How can I install KVM, setup guest operating system as the back-end virtualization technology for non-graphic Ubuntu Linux 14.04 LTS server?
You can use KVM to run multiple operating systems such as Windows, *BSD, Linux distro using virtual machines. Each virtual machine has its private disk, graphics card, a network card and more.
What is a hypervisor?
Sample outputs:


Sample outputs:

You can use KVM to run multiple operating systems such as Windows, *BSD, Linux distro using virtual machines. Each virtual machine has its private disk, graphics card, a network card and more.
What is a hypervisor?
KVM is a hypervisor that creates and run virtual machines. A server on which a hypervisor is running is called as a host machine. Each virtual machine is referred to as a guest machine. Using KVM, you can run multiple operating systems such as CentOS, OpenBSD, FreeBSD, MS-Windows running unmodified.
Steps for installing KVM on Ubuntu Linux 14.04 LTS
- The host server located in the remote data center and it is a headless server.
- All commands in this tutorial typed over the ssh based session.
- You need a vnc client to install the guest operating system.
- In this tutorial, you will learn how to install KVM software on Ubuntu and use KVM to setup your first guest VM.
Find out if server is capable of running hardware accelerated KVM vm
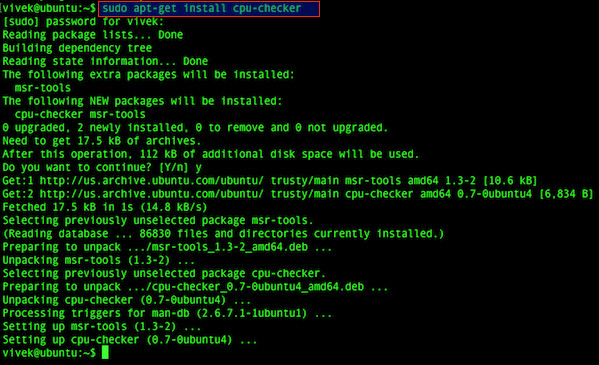
You need to use the kvm-ok command to determine if the server can host hardware accelerated KVM virtual machines. First install cpu-checker package using the followingapt-get command:
Sample outputs:

$ sudo apt-get install cpu-checkerSample outputs:
Next, run the following command:
$ sudo kvm-okSample outputs:
INFO: /dev/kvm exists
KVM acceleration can be used
Install kvm on Ubuntu Linux
Type the following apt-get command to install kvm and related software:
Sample outputs:

Default configuration locations
$ sudo apt-get install qemu-kvm libvirt-bin virtinst bridge-utilsSample outputs:
Default configuration locations
- Default directory: /var/lib/libvirt/
- ISO images for installation: /var/lib/libvirt/boot/
- VM installation directory: /var/lib/libvirt/images/
- Libvirt configuration directory for LVM/LXC/qemu: /etc/libvirt/
More about the default networking for VM
The default networking is called 'default'. To list networks, enter:
Sample outputs:
$ sudo virsh net-listSample outputs:
 Name                 State      Autostart     Persistent
----------------------------------------------------------
 default              active     yes           yes
For network information, enter:
Sample outputs:
$ sudo virsh net-info defaultSample outputs:
Name:           default
UUID:           1c0abaa3-8d17-45b5-85e9-c0d48cec94f9
Active:         yes
Persistent:     yes
Autostart:      yes
Bridge:         virbr0
To dump network information in XML format, enter:
Sample outputs:
$ sudo virsh net-dumpxml defaultSample outputs:
<network connections='1'>
  <name>default</name>
  <uuid>1c0abaa3-8d17-45b5-85e9-c0d48cec94f9</uuid>
  <forward mode='nat'>
    <nat>
      <port start='1024' end='65535'/>
    </nat>
  </forward>
  <bridge name='virbr0' stp='on' delay='0'/>
  <ip address='192.168.122.1' netmask='255.255.255.0'>
    <dhcp>
      <range start='192.168.122.2' end='192.168.122.254'/>
    </dhcp>
  </ip>
</network>
Create a CentOS Linux VM
First, grab the CentOS Linux 7.x DVD ISO file:
Sample outputs:
$ cd /var/lib/libvirt/boot/
$ sudo wget http://mirrors.kernel.org/centos/7/isos/x86_64/CentOS-7-x86_64-Minimal-1511.iso
$ ls
Sample outputs:
CentOS-7-x86_64-Minimal-1511.iso install58.iso
To provision new virtual machines use virt-install command. In this example, I'm creating a CentOS 7.x VM with 1GB RAM, 1 CPU core, and 20GB disk space, enter:
Sample outputs:
$ sudo virt-install \
--virt-type=kvm \
--name centos7 \
--ram 1024 \
--vcpus=1 \
--os-variant=rhel7 \
--hvm \
--cdrom=/var/lib/libvirt/boot/CentOS-7-x86_64-Minimal-1511.iso \
--network network=default,model=virtio \
--graphics vnc \
--disk path=/var/lib/libvirt/images/centos7.img,size=20,bus=virtio
Sample outputs:
Starting install...
Allocating 'centos7.img'                                                                     |  20 GB     00:00
Creating domain...                                                                           |    0 B     00:00
WARNING  Unable to connect to graphical console: virt-viewer not installed. Please install the 'virt-viewer' package.
Domain installation still in progress. You can reconnect to
the console to complete the installation process.
Understanding virt-install options
- --virt-type=kvm : Use kvm as the hypervisor to install CentOS7 guest.
- --name centos7 : Name of the new guest virtual machine instance.
- --ram 1024 : Memory to allocate for guest instance in megabytes.
- --vcpus=1 : Number of virtual cpus to configure for the guest.
- --os-variant=rhel7 : Optimize the guest configuration for a specific operating system variant. Use 'virt-install --os-variant list' to see the full OS list.
- --hvm : Request the use of full virtualization.
- --cdrom=/var/lib/libvirt/boot/CentOS-7-x86_64-Minimal-1511.iso : File or device use as a virtual CD-ROM device for fully virtualized guests. It can be path to an ISO image, or to a CDROM device.
- --network network=default,model=virtio : Connect the guest to the host network. In this example, connect to a virtual network in the host called "default" with nic model called virtio.
- --graphics vnc : Setup a virtual console in the guest and export it as a VNC server in the host. This is useful for our headless server (see below).
- --disk path=/var/lib/libvirt/images/centos7.img,size=20,bus=virtio : Specifies media to use as storage for the guest. A path to /var/lib/libvirt/images/centos7.img storage media to use with size (20 GB) to use if creating new storage and disk bus type set to virtio.
A note about VNC and a headless server
This is a headless server i.e. a server without a local interface or GUI. There is no monitor or peripherals, such as a keyboard and mouse attached to this server. To continue installation you need to use the vnc client from your own laptop or desktop. To find out information about the vnc server port, enter:
Sample outputs:
$ sudo virsh dumpxml centos7 | grep vncSample outputs:
<graphics type='vnc' port='5901' autoport='yes' listen='127.0.0.1'>
Please note down the port value (i.e. 5901). You need to use an SSH client to setup tunnel and a VNC client to access the remote vnc server.
To access guest domain's VNC console
Type the following SSH port forwarding command:
Where,
$ ssh vivek@server1.cyberciti.biz -L 5901:127.0.0.1:5901Where,
- ssh vivek@server1.cyberciti.biz - Establishes the SSH session to the remote KVM host at server1.cyberciti.biz host.
- -L - Start local port forwarding.
- 5901:127.0.0.1:5901 - Setup tunnel i.e. pass traffic over the internet to access remote server 127.0.0.1 and port 5901. See "Setup SSH To Tunnel VNC Traffic Though Internet" for more information.
Once you have ssh tunnel established, you can point your VNC client at your own 127.0.0.1 (localhost) address and port 5901 as follows:
You should see CentOS Linux 7 guest installation screen as follows:
Just follow on screen instructions to install CentOS 7. After some time CentOS 7 installed successfully on my server and ready to use. Go ahead and click reboot button. The remote server closed the connection to our VNC client. Type the following command to boot up VM for the first time:
$ sudo virsh start centos7Sample outputs:
Domain centos7 started
Verify it:
Sample outputs:
$ sudo virsh listSample outputs:
 Id    Name                           State
----------------------------------------------------
 3     puffy                          running
 5     centos7                        running
Again use an SSH client to setup tunnel and a VNC client to access CentOS 7 vm via the vnc server:
And, there you have it a CentOS 7 vm running KVM on top of the Ubuntu Linux 14.04 LTS server
No comments :
Post a Comment