FTP is a very insecure protocol because all passwords and all data are transferred in clear text. By using TLS, the whole communication can be encrypted, thus making FTP much more secure. This article explains how to set up ProFTPd with TLS on an Ubuntu 15.10 server, how to add an FTP user and to use FileZilla to connect securely with TLS.
This tutorial exists for these OS versions
- Ubuntu 15.04 (Vivid Vervet)
- Ubuntu 12.10 (Quantal Quetzal)
- Ubuntu 11.10 (Oneiric Ocelot)
- Ubuntu 11.04 (Natty Narwhal)
- Ubuntu 10.04 (Lucid Lynx)
On this page
- 1 Preliminary Note
- 2 Install ProFTPd and OpenSSL
- 3 Create the SSL Certificate for TLS
- 4 Enable TLS in ProFTPd
- 5 Add an FTP user
- 6 Configuring FileZilla for TLS
- 7 Download this setup as VM
- 8 Links
1 Preliminary Note
In this tutorial, I will use the hostname server1.example.com with the IP address 192.168.1.100. These settings might differ for you, so you have to replace them where appropriate.
Because we must run all the steps from this tutorial with root privileges, we can either prepend all commands in this tutorial with the string sudo, or we become root right now by typing
sudo su
I will use the nano editor to edit configuration files in this tutorial. If you like to use nano as well and haven't installed it yet, then run this command to install nano.
apt-get install nano
2 Install ProFTPd and OpenSSL
OpenSSL is needed by TLS; to install ProFTPd and OpenSSL, we simply run:
apt-get install proftpd openssl
You will be asked a question:
Run proftpd: <-- standalone
For security reasons, you should add the following lines to /etc/proftpd/proftpd.conf:
nano /etc/proftpd/proftpd.conf
[...]
DefaultRoot ~
ServerIdent on "FTP Server ready."
[...]
The first option enables chrooting of FTP users into their home directory and the second option enables a ServerIdent message that does not contain any information about the used FTP server software, version or OS so that a potential attacker don't gets these details on the silver plate.
3 Create the SSL Certificate for TLS
In order to use TLS, we must create an SSL certificate. I create it in /etc/proftpd/ssl, therefore I create that directory first:
mkdir /etc/proftpd/ssl
Afterward, we can generate the SSL certificate as follows:
openssl req -new -x509 -days 365 -nodes -out /etc/proftpd/ssl/proftpd.cert.pem -keyout /etc/proftpd/ssl/proftpd.key.pem
Country Name (2 letter code) [AU]: <-- Enter your Country Name (e.g., "DE").
State or Province Name (full name) [Some-State]:<-- Enter your State or Province Name.
Locality Name (eg, city) []:<-- Enter your City.
Organization Name (eg, company) [Internet Widgits Pty Ltd]:<-- Enter your Organization Name (e.g., the name of your company).
Organizational Unit Name (eg, section) []:<-- Enter your Organizational Unit Name (e.g. "IT Department").
Common Name (eg, YOUR name) []:<-- Enter the Fully Qualified Domain Name of the system (e.g. "server1.example.com").
Email Address []:<-- Enter your Email Address.
and secure the generated certificate files.
chmod 600 /etc/proftpd/ssl/proftpd.*
4 Enable TLS in ProFTPd
In order to enable TLS in ProFTPd, open /etc/proftpd/proftpd.conf...
nano /etc/proftpd/proftpd.conf
... and uncomment the Include /etc/proftpd/tls.conf line:
[...]
#
# This is used for FTPS connections
#
Include /etc/proftpd/tls.conf
[...]
Then open /etc/proftpd/tls.conf and make it look as follows:
nano /etc/proftpd/tls.conf
<IfModule mod_tls.c>
TLSEngine                  on
TLSLog                     /var/log/proftpd/tls.log
TLSProtocol TLSv1.2
TLSCipherSuite AES128+EECDH:AES128+EDH
TLSOptions                 NoCertRequest AllowClientRenegotiations
TLSRSACertificateFile      /etc/proftpd/ssl/proftpd.cert.pem
TLSRSACertificateKeyFile   /etc/proftpd/ssl/proftpd.key.pem
TLSVerifyClient            off
TLSRequired                on
RequireValidShell          no
</IfModule>
If you use TLSRequired on, then only TLS connections are allowed (this locks out any users with old FTP clients that don't have TLS support); by commenting out that line or using TLSRequired off both TLS and non-TLS connections are allowed, depending on what the FTP client supports.
Restart ProFTPd afterward:
systemctl restart proftpd.service
That's it. You can now try to connect using your FTP client; however, you should configure your FTP client to use TLS (this is a must if you use TLSRequired on) - see the next chapter how to do this with FileZilla.
If you're having problems with TLS, you can take a look at the TLS log file /var/log/proftpd/tls.log.
5 Add an FTP user
The ProFTPD configuration used in thus tutorial authenticates users against the Linux system user database (/etc/passwd and /etc/shadow). In this step, I will add a user "tom" to be used for FTP login only.
useradd --shell /bin/false tom
This will add the user "tom" with the shell /bin/false. This shell ensures that he can login by FTP but not by SSH. The home directory of a user is /home/[USERNAME] by default, in our case /home/tom. ProFTPD is configured to jail the user to his home directory, so he can not access system files outside of /home/tom. If you like to set a different home directory, use the command below:
useradd --home /srv/tomftp --create-home --shell /bin/false tom
This command sets a different home directory, in case of this example the directory /srv/tomftp for the user.
The next step is to set a password for the user tom, execute the passwd command:
passwd tom
And enter the new password twice, when requested.
6 Configuring FileZilla for TLS
In order to use FTP with TLS, you need an FTP client that supports TLS, such as FileZilla.
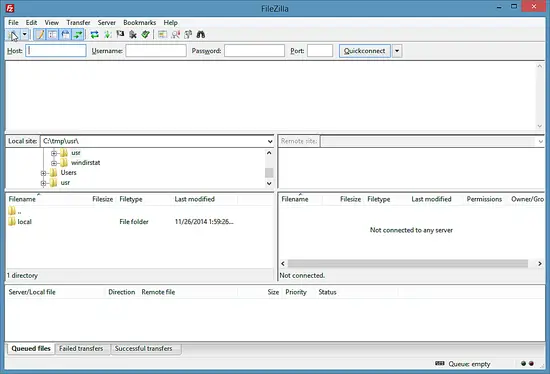
In FileZilla, open the Site Manager:
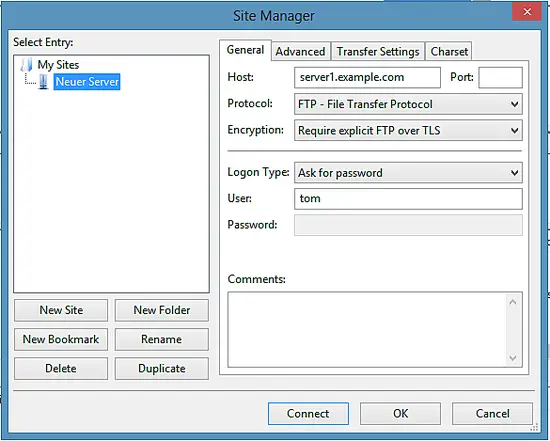
Select the server that uses ProFTPd with TLS; in the Server Type drop-down menu, select FTPES instead of normal FTP:
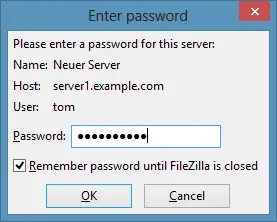
Now you can connect to the server, FileZilla will ask for a password.
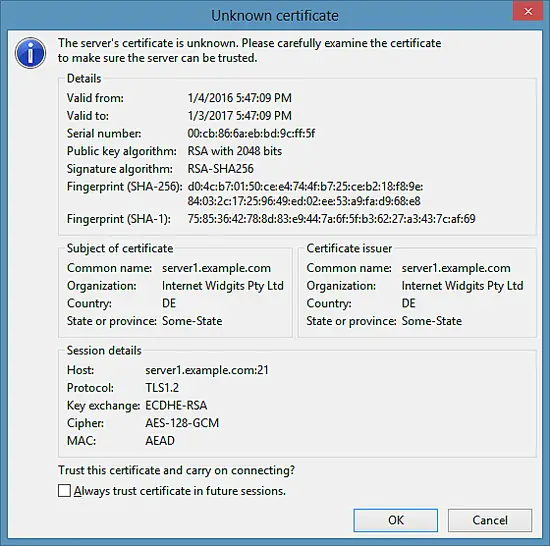
If you do this for the first time, you must accept the server's new SSL certificate:
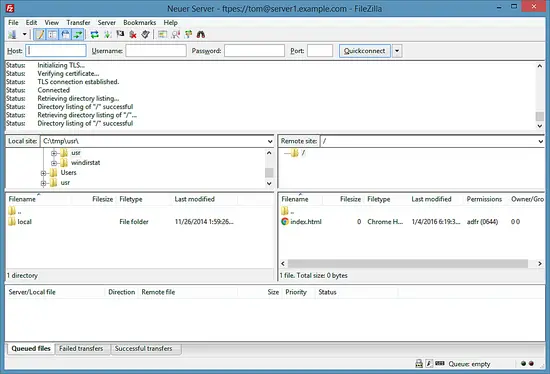
If everything goes well, you should now be logged in on the server:
7 Download this setup as VM
The setup that is described in this tutorial is available for download to HowtoForge subscribers. The ready to use virtual machine in OVA / OVF format is compatible with VMWare and Virtualbox.
Login Details of the VM
The virtual machine has an SSH user with the name "administrator" and password "howtoforge". This SSH users has sudo permissions.
The password of the FTP User "tom" is "tom".
The IP address of the VM is 192.168.1.100, the IP can be changed in the file /etc/network/interfaces.
Please change the passwords of all users before you use the VM as live system.
8 Links
- ProFTPd: http://www.proftpd.org/
- FileZilla: http://filezilla-project.org/
- Ubuntu: http://www.ubuntu.com/

